1.Download and Install Persicope
First of all, you’ll need to download periscope from the Google Play Store or from iTunes. Next thing you need to do is get a Twitter account (if you don’t have it already). It will allow you to login only if you have a twitter account.
2. Explore Lists
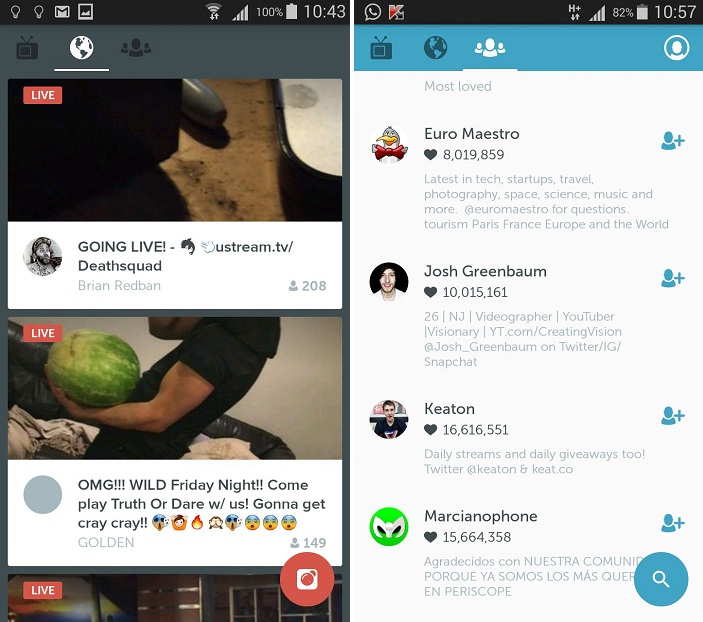
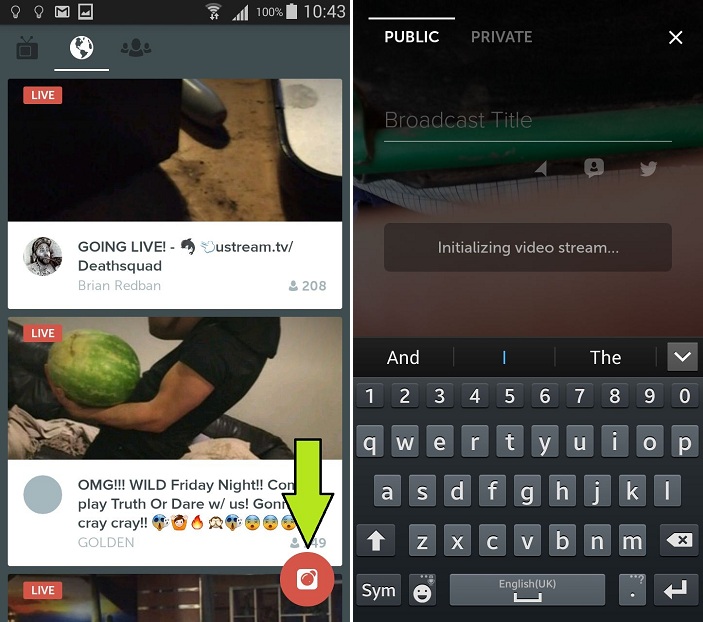
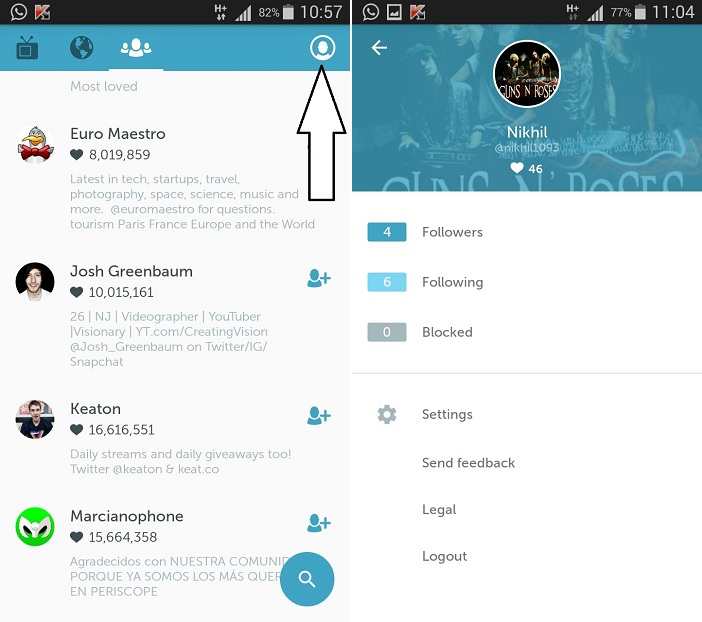
Once you log into it, you’ll see a heap of different things on the screen. A list which shows if anyone you are following is live or not, another list shows a global list – showing live streams from around the world and last part would be a list showing most loved people – people who have got maximum hearts (don’t worry if you have no clue about the hearts are in periscope, you’ll get to learn about them soon).
3. Watch Live Streams
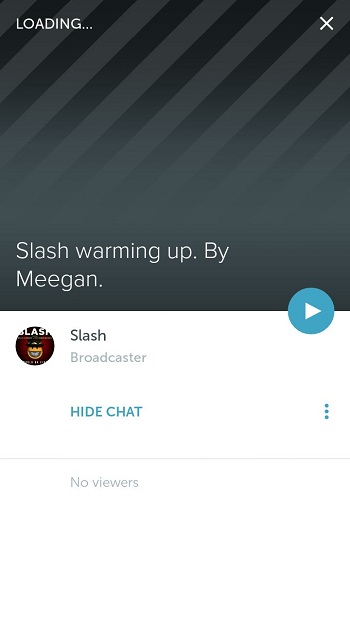
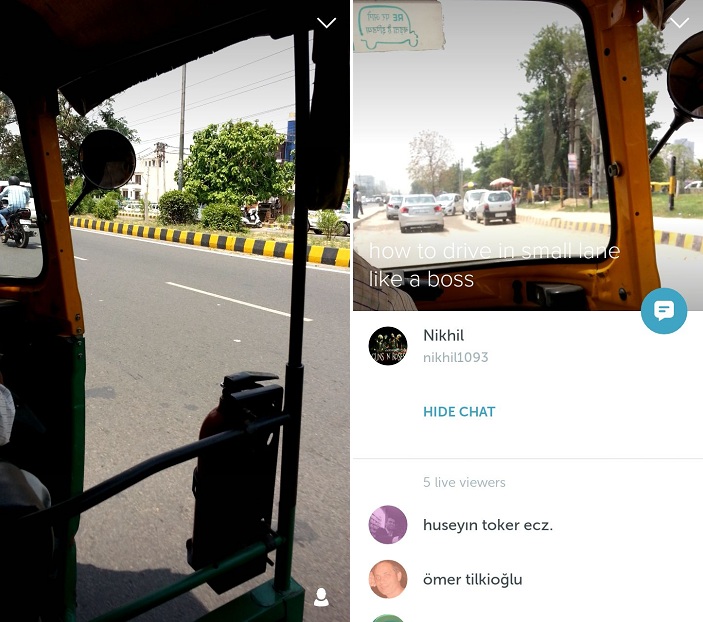
To check any live stream, you can either see if anyone you are following is live or you can also go to the global list and click on any of the live streams from different parts of the world Once you open a live stream, you’ll be greeted with a screen similar to the screen in an image below. It will usually say LOADING… at the top, if it straightway goes to the stream then you can consider yourself quite lucky or maybe your internet speed has got to do more with it than your luck :D.
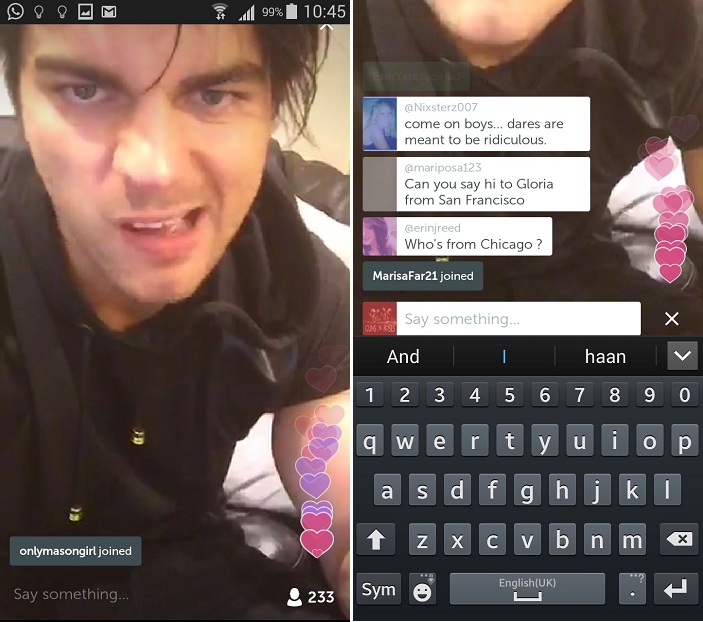
Next thing that you’ll see in a live stream would be an option to ‘say something’; It is a way to post messages to the live stream you are watching. Sometimes, you’ll see ‘broadcast full’ written instead of ‘Say Something’, this happens when there are a lot of viewers on a specific stream and it gets difficult for periscope to incorporate new users into the chat.
Even if you don’t get the option of saying something, you can still let the broadcaster know that someone likes his video by tapping on the screen, each time you tap, you’ll see a heart emerge on the screen, it might be really hard for you to make out if your tap has generated a heart on not, especially in crowded broadcasts, so if you wish to see hearts come up when you tap, you should get into a less crowded broadcast and tap on your screen. You’ll love the feeling of making hearts emerge on screen.
4. Broadcast Your Own Live stream Video
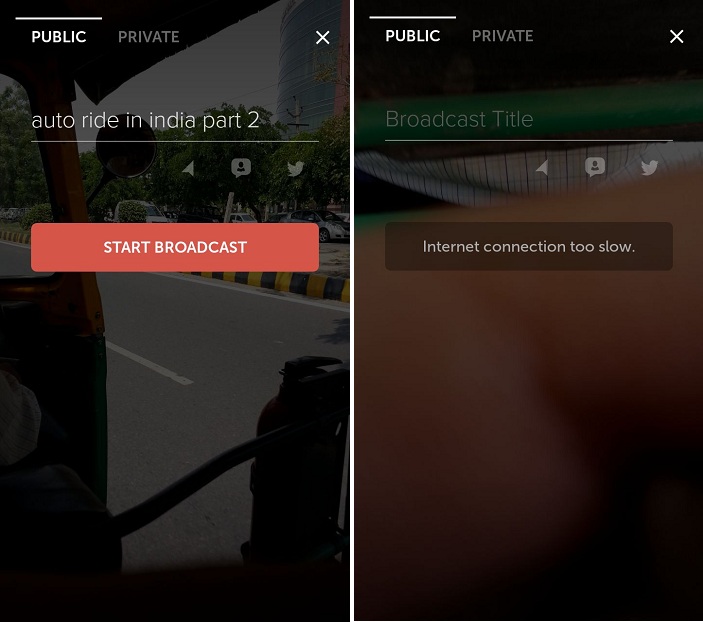
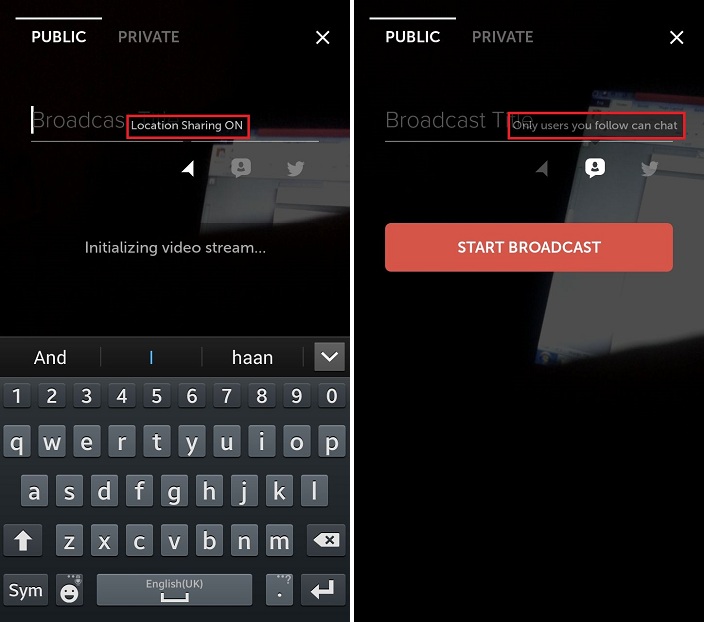
So, this was about seeing live broadcasts on periscope, what if we were to broadcast something of our own on periscope? Now let’s focus on using periscope as a broadcaster. To broadcast a video of your own, you just need to open the app and on the bottom right of your screen you’ll see an orange icon. When you click on it, you’ll see a screen with BROADCAST TITLE PUBLIC PRIVATE etc. written on it. You’ll also see either initializing video stream or start broadcast written on the screen as you can see in the images below (You might also see Internet connection too slow written instead of initializing video stream or start broadcast.).
Public and private are the options for a broadcaster to decide how he/she wishes to broadcast his/her stream. The moment you get the option to start broadcast and you press on the option, you’ll see your video with a small icon on the bottom right symbolizing the users who are watching that stream at any point of time. You can always click on that small icon at the bottom to see who all are watching your steam. If someone writes something in the Say something box, then it gets posted on your video and if someone taps on his/her screen, it makes a heart emerge from the bottom right of the screen.
How loved you are as a periscope user is decided on the basis of total number of hearts that you get. You can always see how many hearts you have got by going to the third option in the home screen (comes by swiping twice to the left), and then by pressing on an icon on the top right corner of your screen; it will tell you how many followers you have, who all are you following and also the total number of hearts that you have got as a periscope user.
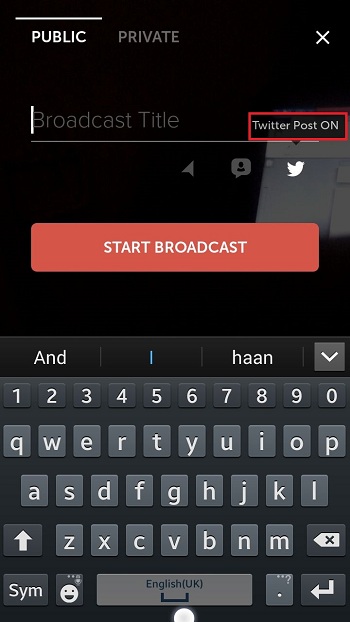
A few more things that you should know about using periscope is that when you choose to have a private broadcast, then the app will ask you who all among your followers should be notified about your broadcast. Also, there are 3 small icons below the space where periscope asks you to enter the broadcast title. The one on the left is for turning on the location of your broadcast so that everyone can see from where you have started your broadcast, the one in the middle, if turned on, would only allow the users, whom you follow, to chat. The one on the right sends a post on twitter about your live broadcast.
5. Share Other’s Live stream
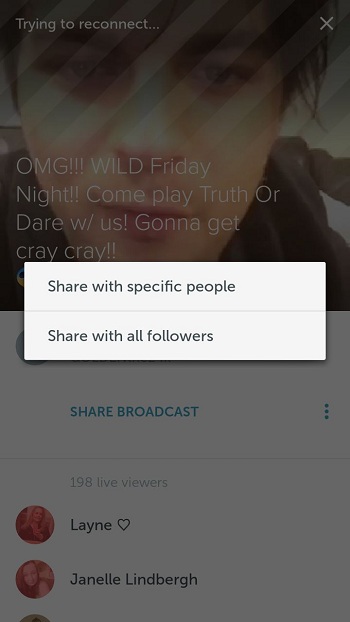
Another thing you can do while viewing someone else’s broadcast is share their broadcast, now for this you have two options, one option allows you to share that broadcast only with a specific set of people, whereas another option allows you to share it with all of your followers.
SEE ALSO: How To Use Dubsmash, A Beginner’s Guide So, we come to an end to the Periscope Beginner’s Guide. If you have something to add to this guide, feel free to let us know in the comments.
