2 Ways to Switch Users in Mac
There are a few ways you can use when switching from one user to another. We’ll be discussing all of the ways you can use, and then you can decide for yourself which one suits your needs best. As always, you can use the table of contents below to skip over to any particular method that piques your interest.
How to Enable Multiple Users and Guest Users
First, let’s take a quick look at how you can add multiple users on your Mac, and how to enable guest users as well. Enable Multiple Users
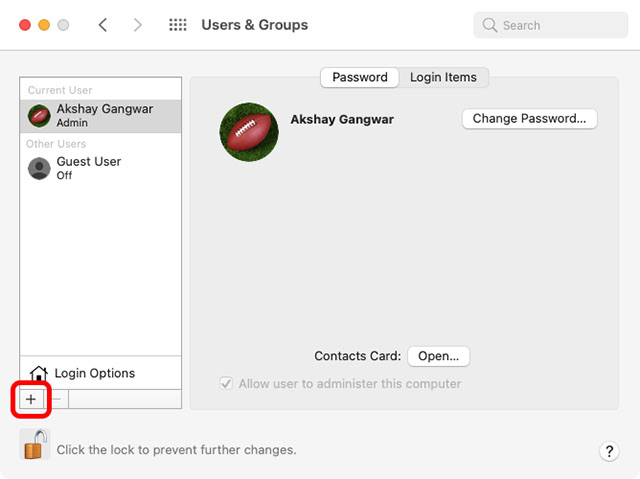
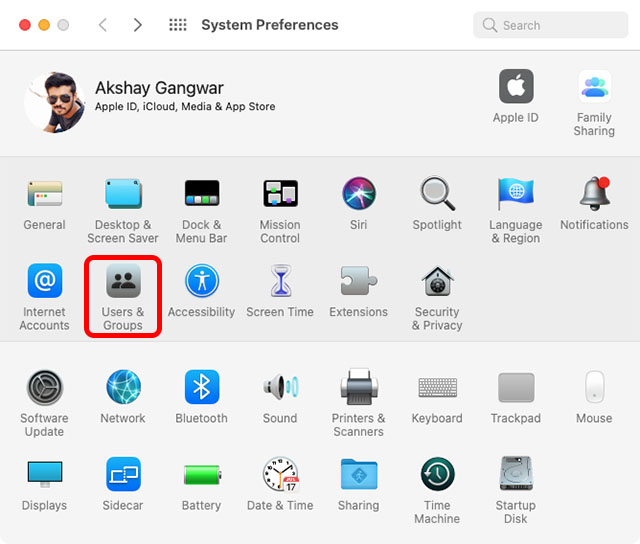
First we will add new users in Mac settings. Go to System Preferences -> Users & Groups.
Click on the padlock icon and enter your password.
Click on the plus icon.
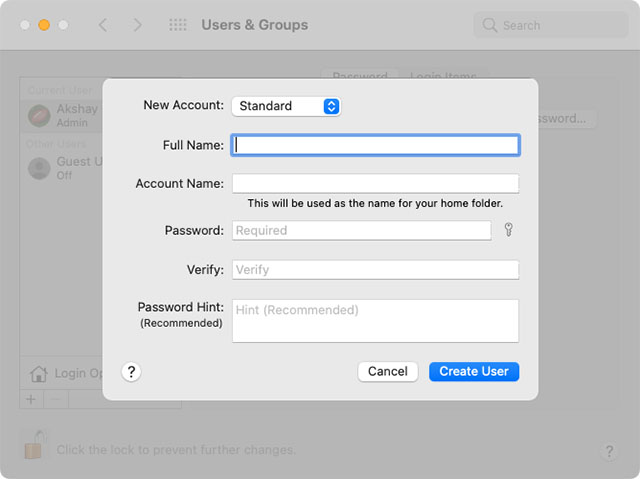
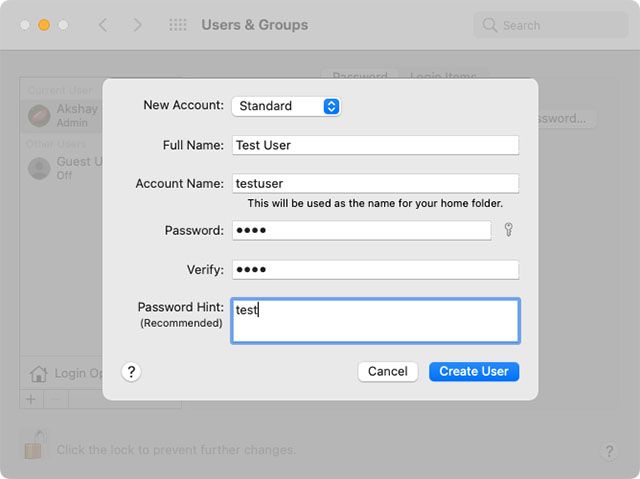
You can now create a new user, assign their own password, and even set them as a Standard account or an administrator account.
Once done, just click on ‘Create User’.
Enable Guest User If you don’t usually share your Mac, but sometimes need to hand it off to other people for work, etc, you can enable a guest user. Here’s how.
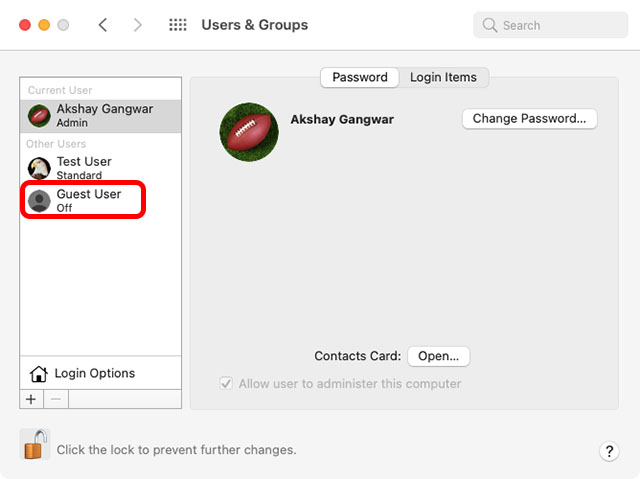
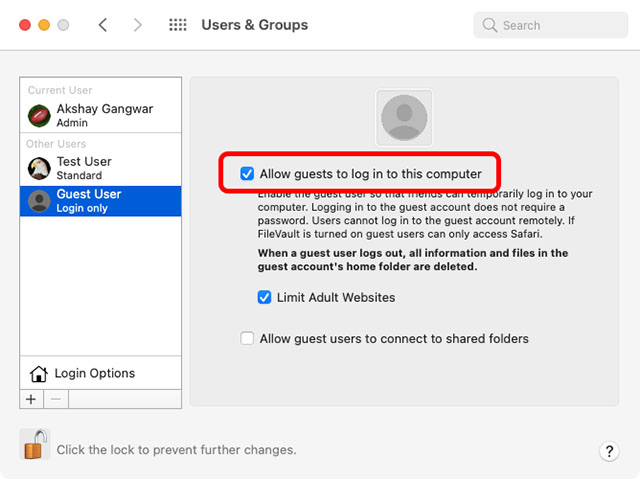
In the same menu where we created a new user, you will see a Guest User. Click on it.
Click on the checkbox that says ‘Allow guests to log in to this computer’.
You can also limit access to adult websites if you’re going to be handing your system to a kid.
Use Fast User Switching
Now that we have a couple of accounts on our Mac, let’s take a look at all the ways we can switch users in Mac. First let’s take a look at fast user switching. This feature basically lets you switch over to a new user without logging out of the account that’s currently logged in. It’s disabled by default, but if you want to use it, you can check out our article on how to enable fast user account switching for a step-by-step guide.
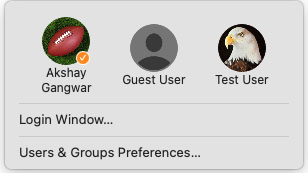
Once you have this enabled you can switch users from the Control Center or the Menu Bar.
Switch Users from Lock Screen
Another way you can switch users in Mac is straight from the lock screen itself. Here’s how to do that.
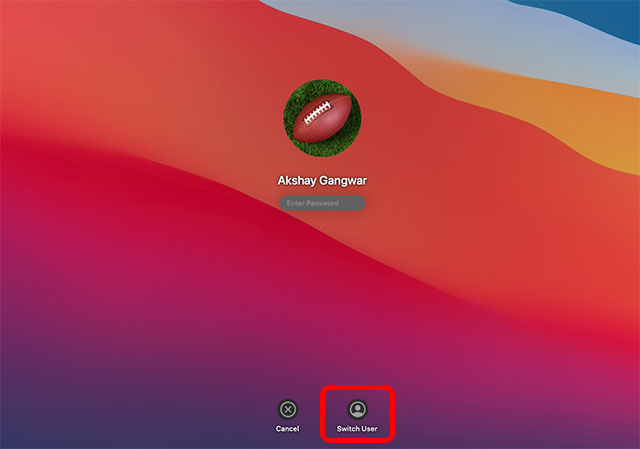
Lock your Mac by going to Apple menu -> Lock Screen. Or use the keyboard shortcut ‘command+control+Q’ to lock it quickly. Click on ‘Switch User’
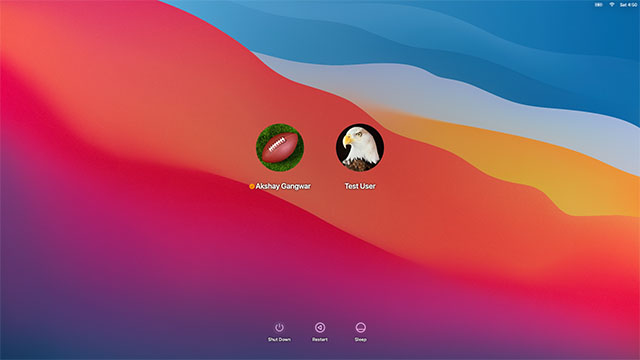
You can now choose which user you want to log in with. Just click on the user name, enter the password and you’re good to go.
Bonus: Switch Users Within Terminal
This is not exactly a way to completely switch users on a Mac. However, you can use the Terminal to log into another user account on your Mac and access their files if needed. Don’t worry, the Terminal commands here aren’t too confusing or difficult. Here’s what you need to do.
Open the Terminal and use the following command.
Replace [username] with the username of the account you want to switch to. For example, I created a Test User with the username ‘testuser’ above. So I can use the command
You will be prompted to enter the password for the user. Simply type it in and hit the return/enter key.
You are now logged into the user account you entered. As you can see in the screenshot, it says ‘testuser@Akshays-MBP’.
I can now use Terminal commands to head into directories in Test User’s accounts and see all the files within the account as well.
So yeah, this isn’t really the same as switching user accounts, but it’s a neat way to take a look at files on another account if you ever need to do that.
Maintain Multiple Users on Your Mac Easily
Having multiple user accounts is the best way to share a Mac between different users. It ensures that every user gets their own space to work in, and files are not mixed between users. Plus, if you just need to temporarily let a friend or family member use your Mac, you can even use Guest accounts to let them use your Mac without having access to any of your files. So, are you using multiple user accounts on your Mac? If so, which method do you like using to switch between them? Let us know in the comments.
![]()
