Use Offline OCR Tool on a Chromebook
Here, we are going to use the powerful Tesseract OCR service that is open-source, free, and maintained by Google. Since it’s a command-line tool, we will be using gImageReader which is developed on Tesseract’s engine. It has a GUI interface and works really well without any issues. On the Chromebook, we are going to use the Windows version of gImageReader for which we need Linux support. And we will use a compatibility layer called Wine to run Windows apps on a Linux system. Bear in mind, Chromebooks issued by schools won’t be able to use this method due to the lack of Linux support. If you find the instructions lengthy and complex then you can use online OCR services (e.g. newocr.com). As for this article, I am strictly explaining an offline way to perform OCR conversion. On top of that, the process is completely free and can convert large stacks of documents on your Chromebook just like native apps so that is great. Having said all of that, let’s now go through the guide.
Set Up Offline OCR Tool on a Chromebook
First of all, enable Linux and set up Wine on your Chromebook by following our linked guides. The process is a bit lengthy but certainly doable.
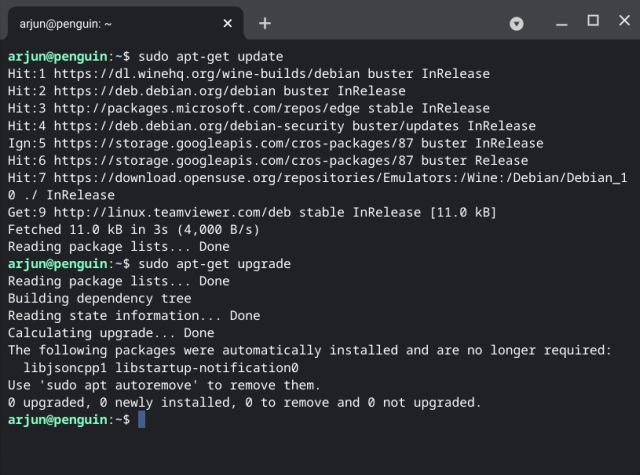
Next, run the below commands one by one in the Linux Terminal to keep your Linux up to date.
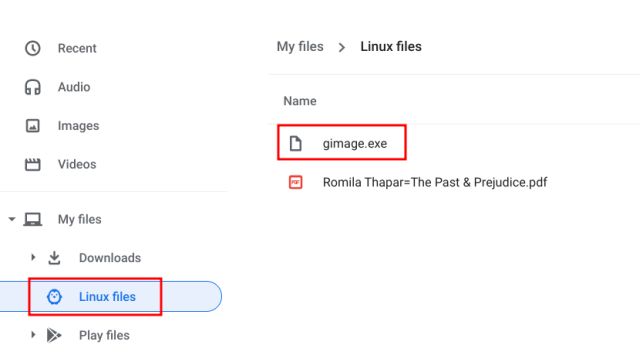
Having done that, download gImageReader (Free) and move it to the Linux files section. After that, rename it to something short. For instance, gimage. Also, move the image or PDF file to the Linux files section that you want to convert.
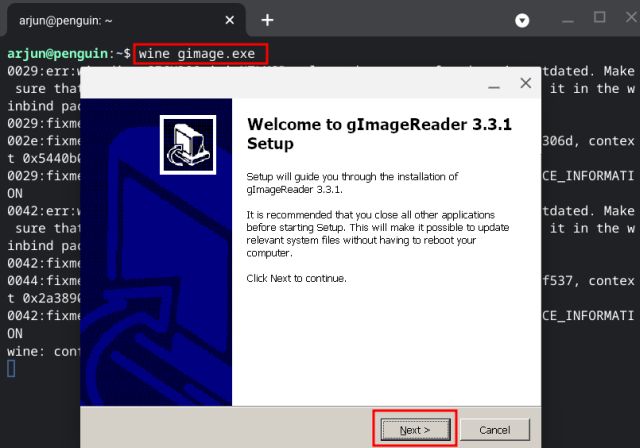
Now, open the Linux terminal and run the below command to install gImageReader. It will start a setup wizard just like Windows. So just click on “Next” and install the application.
Run gImageReader on a Chromebook
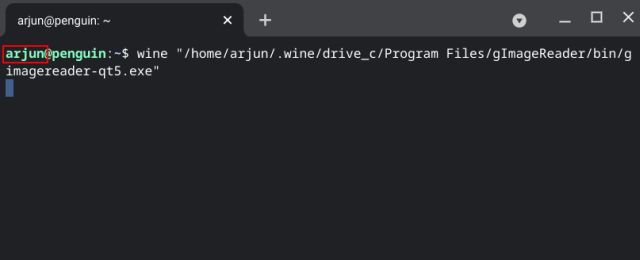
After the installation, execute the below command in the Linux Terminal to run gImageReader. Make sure to change username to the actual username you have assigned to Linux on your Chromebook. To find it, check the initial name before @penguin under the Linux Terminal. That’s your username. Note: If you want to open gImagReader through an easy shortcut then refer to our above guide on how to set up Wine and go through the shortcut section.
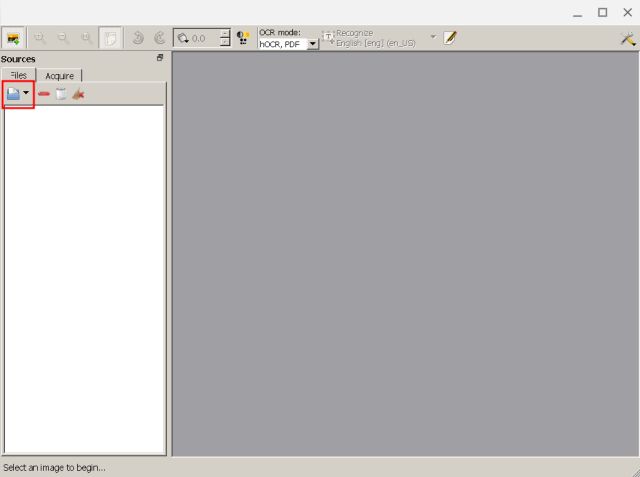
Now, the OCR tool will open up on your Chromebook. Click on the “File” icon to get started.
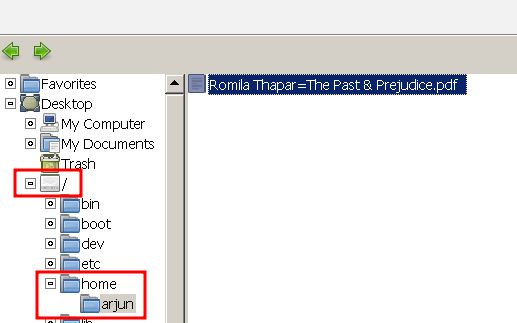
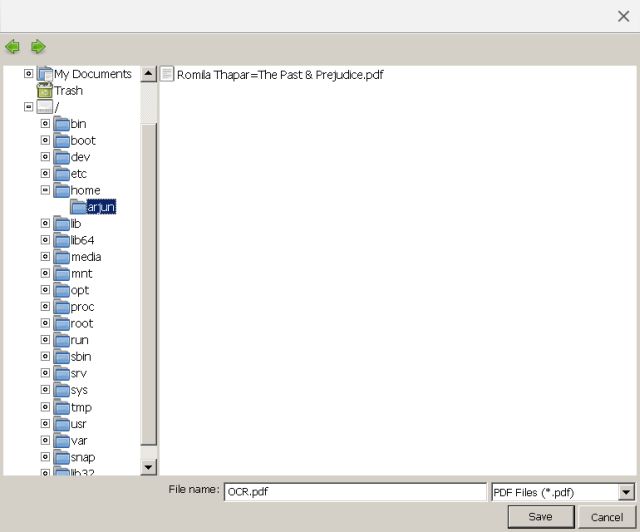
Here, click on / and navigate to home -> username. You will find the PDF file that you had moved to the Linux section. Select and open it.
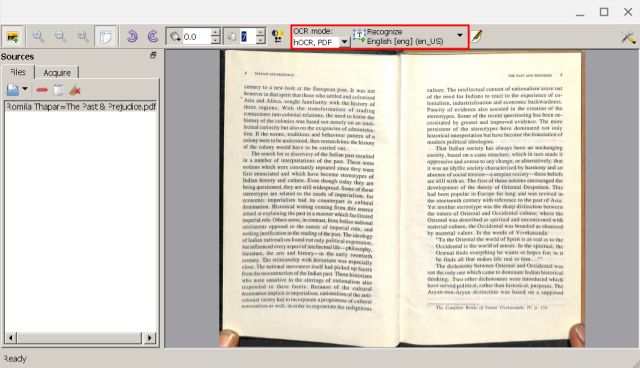
Now, simply click on “OCR Mode” and change it to “hOCR, PDF” if you want a searchable output in PDF format. If you just want searchable text then keep it “Plain Text”. Finally, click on “Recognize all” and it will start the OCR conversion. Keep in mind, depending on the size of the document, the process may take some time.
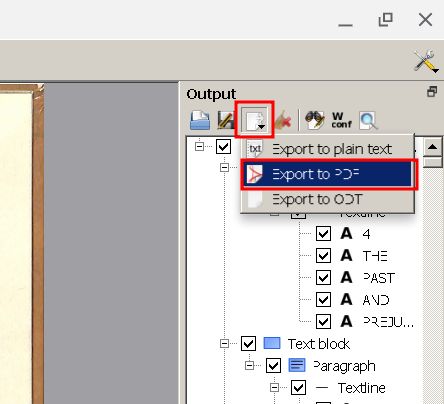
Finally, click on the Export icon located at the right pane and select “Export to PDF“. Next, click on “OK” if you get a dialog box.
Now select where do you want to save the converted document. Make sure to open / and navigate to home -> username and then save the file.
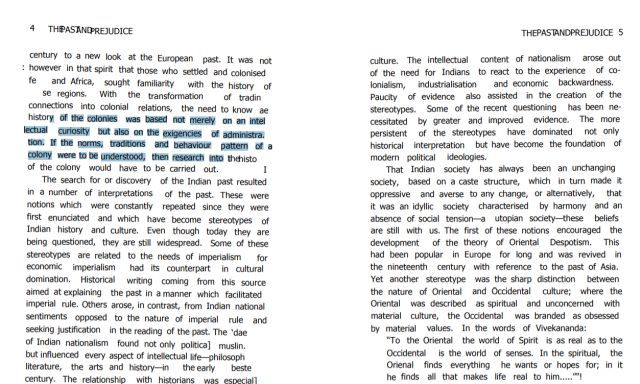
This is what the converted document looks like. The conversion is absolutely on point with minimal errors. For good measures, I also threw a heavy file (36MB) having 41 pages and it converted the whole file like a charm.
List of Popular Chromebooks
Our tutorial will work with all of the following Chromebooks. It is not an exhaustive list and is only here to serve as an example.
Use Tesseract OCR on a Chromebook Using gImageReader
So that is how you can run an offline OCR tool on a Chromebook with help of Linux and Wine. Sure, the installation process is a bit tedious but once you have set it up, it’s immensely helpful to convert OCR files to searchable PDFs in a jiffy. For the record, I tried the dedicated Debian installer of gImageReader but the output was not as good as the Windows one which is pretty weird. Anyway, that is all from us. For more such tips, go through our article on the best Chrome OS tips and tricks.

