You can opt for your favourite language in Windows 10 pretty easily although changing some settings can be a bit tricky in Windows 10, as there’s a little confusion between “Control Panel” and “Settings”. So, without any further wait, let’s find out how you can do it.
How to Add New Language in Windows 10
Windows 10 allows you to add as many languages as you want. The steps are pretty simple:
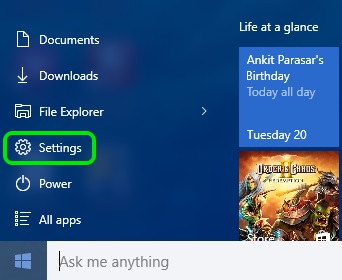
Go to the Start menu and click on “Settings“.
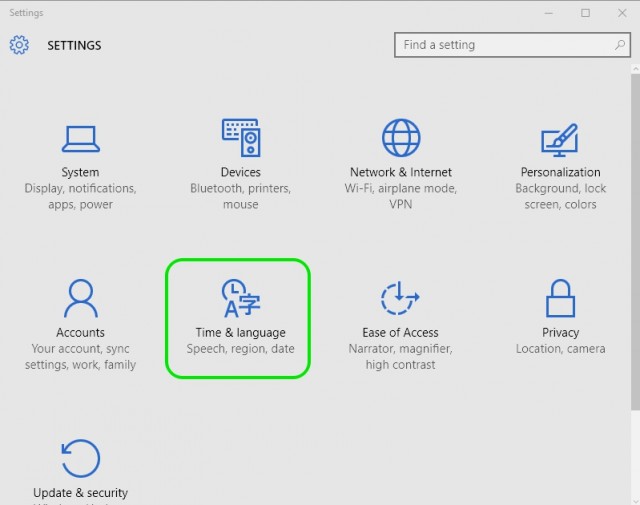
In the “Settings” page, go to “Time & Language” option.
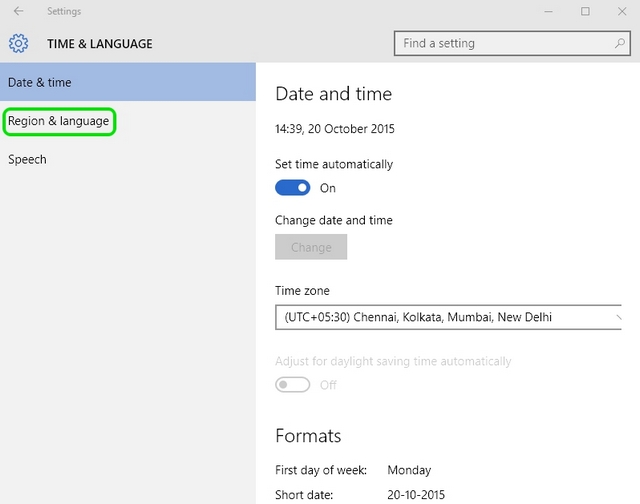
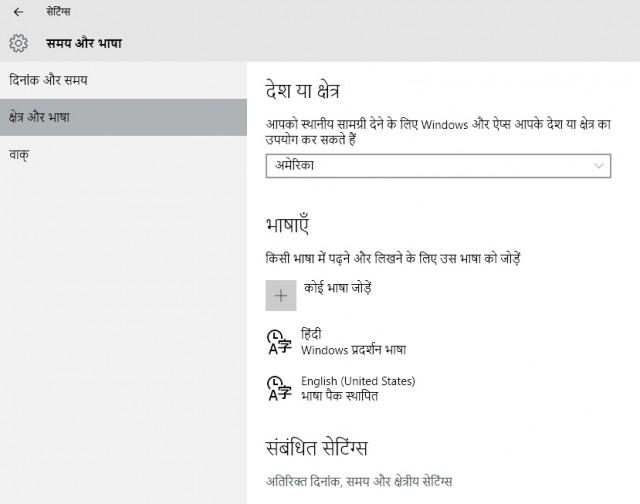
Then, click the “Region & Language” tab.
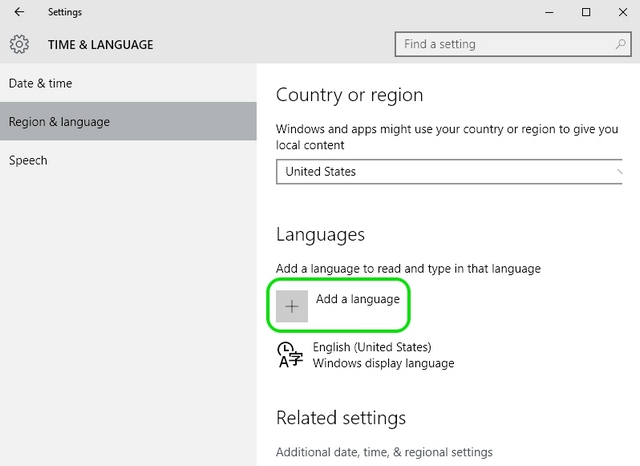
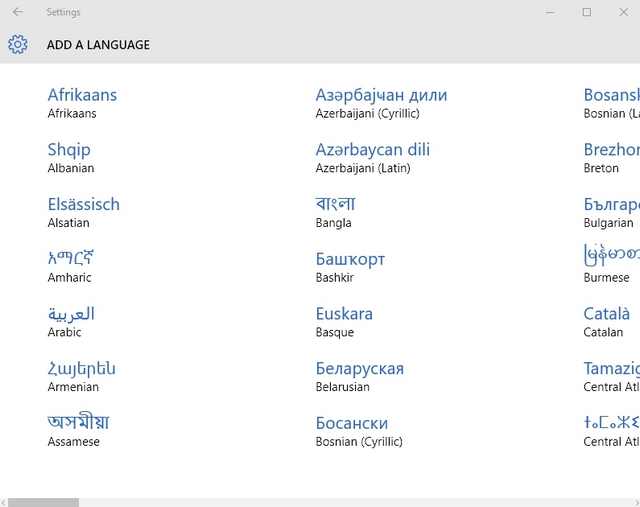
To add new language pack, click “Add a language“.
5. Once you do that, you will be shown all the languages that Windows 10 currently supports. Then, select the language you want to add.
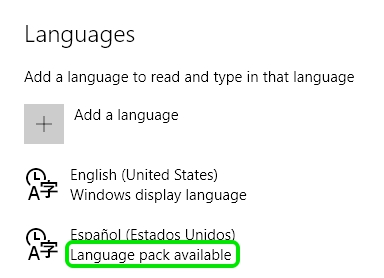
- After you select the language, you will see your language with a “language pack available” subtext.
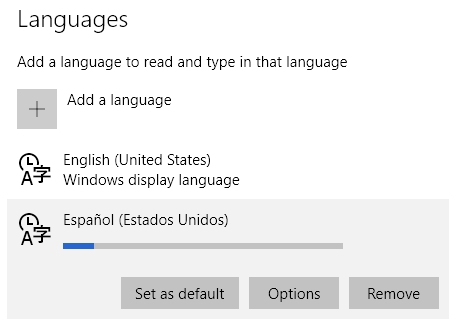
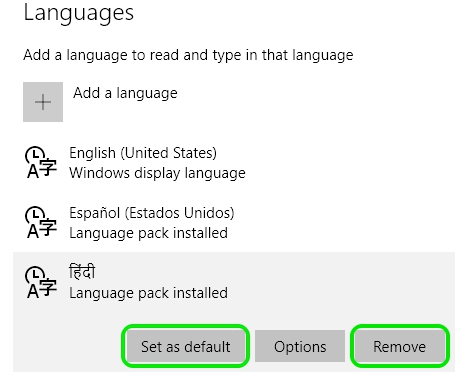
7. When you click on the language, you will get options to “Set as default“, “Options” and “Remove“.
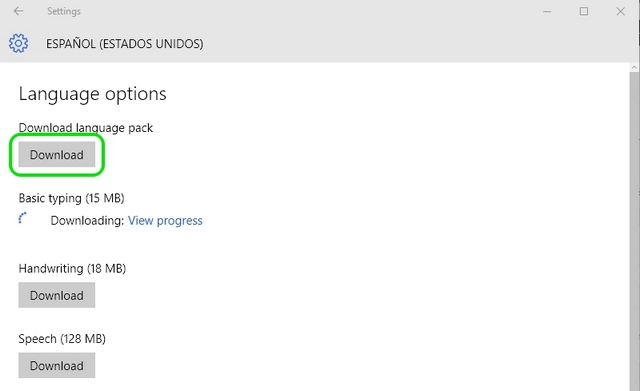
Click the “Options” button. Then, you’ll see options to “Download language pack” and the download “basic typing“, “Handwriting” and “Speech“, if the language pack supports it.
Once you hit the “Download” button, the language pack will start downloading.
When the language pack is downloaded, you will have the option to “set as default“.
Some languages will have optional features that you can download separately. You will have to restart your PC for the new language changes to take effect.
How to Change and Remove Language in Windows 10?
Changing your language in Windows 10 is pretty simple. Here are the steps:
- Go to “Settings” in the Start menu.
- Click the “Time & Language” option.
- Go to the “Region & Language” tab.
- You will see all the language packs you have installed. You can change the default language by just clicking on the language you want to set and hitting the “set as default” button. You can also remove a language by simply clicking the “Remove” button.
5. Once done, you will have to restart your PC for the new language to take over. Note: Changing the default language in Windows 10 will make the chosen language default in typing and speech. To make it the Windows display language, you will have to follow the steps below.
How to Change Windows 10 Display Language
You can have Windows show up everything in your favourite language. Follow the steps to change your Windows display language:
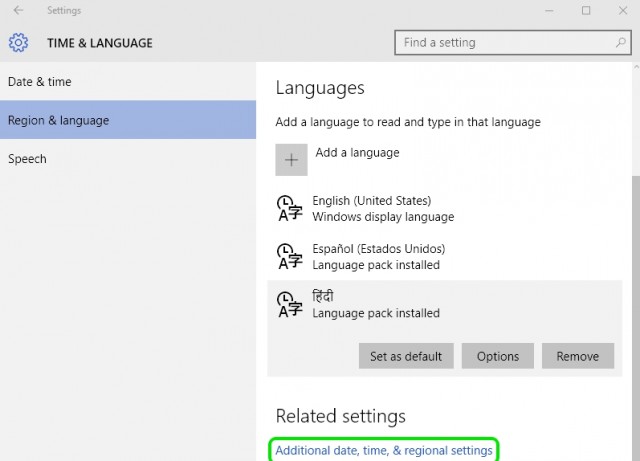
In the “Region & Language” Settings, click the highlighted “Additional Date, Time & Regional Settings” below.
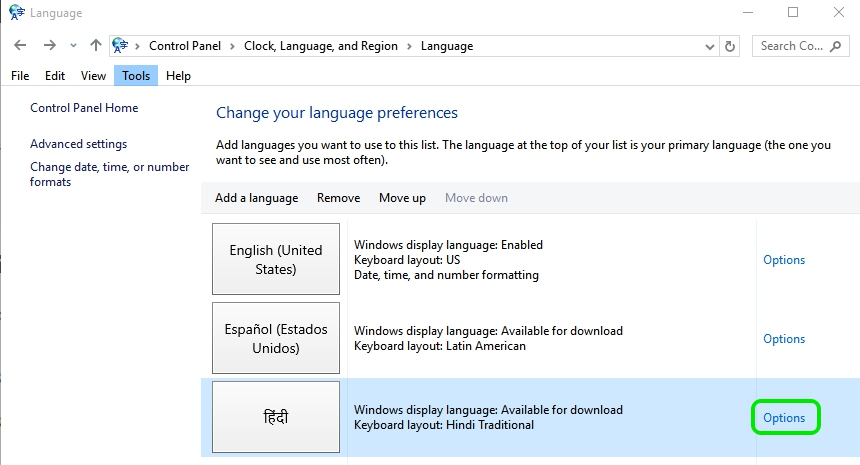
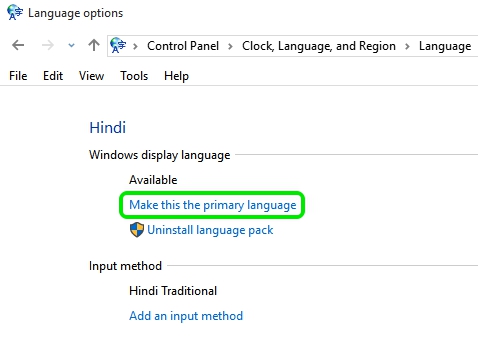
It will take you to the Language page in the Control Panel. Here you can change your language preferences and Windows display language.
Click the “Options” button next to the language you want to choose as Windows display language.
In Options, Windows will first check if your language is supported for Windows display. If it’s supported, Windows will ask you to download the language pack. Click on “Download and install language pack“.
Then, Windows will start downloading and installing the language pack. If you already have the language pack downloaded, it will get straight to installing.
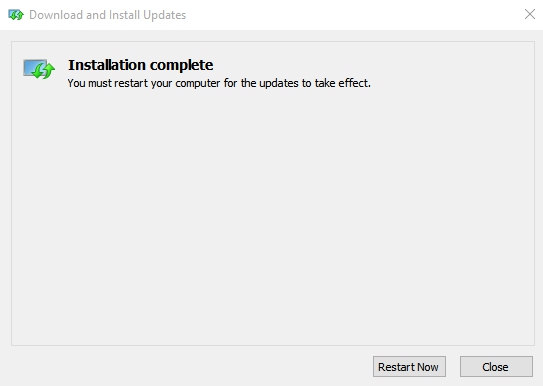
Once the installation is complete, Windows will ask you to restart your system.
After the restart, go to the same page and click “make this as my primary language“.
Then, you will need to log off and then log in for the changes to take effect.
Languages Windows 10 Supports
Here are the languages Windows 10 supports. Along with national languages of various countries, Windows 10 also supports various regional languages. Take a look to see if you have your regional language supported in Windows 10:
SEE ALSO: How To Disable Windows 10 Tracking
So, this is how you can add, remove and change languages in Windows 10. We hope you found the tutorial helpful. Let us know in the comments below if you have any doubts.
